When to use this page: using the ML Cloud self-hosted LLM API — creating API keys, using the chat interface, and integrating the models with AI agents.
ML Cloud LLM

The ML Cloud offers API access to self-hosted open weight LLM(s). As this service is in the pilot phase, the following conditions apply:
- Access: A separate password is required to access the webUI.
- Cost: The service is currently free to use without limits.
- Model: Available model(s) are generally quantized versions in order to handle concurrency within allocated hardware.
Info
If you did not receive an email invite, or forgot the password, please raise a ticket at support@mlcloud.uni-tuebingen.de with [Local LLM] in the subject. There is no UI to reset the password yourself at the moment.
 Head on over to https://llm.mlcloud.uni-tuebingen.de to create your first virtual key.
API Keys
To interact with our local LLM service via LiteLLM, you will need an API key. An API key (or virtual key) is a unique identifier used to authenticate your requests to the server.
Why use API keys?
- Authentication: It confirms that the request is coming from an authorized member of the institute.
- Resource Management: It allows us to monitor usage and ensure that no single process accidentally consumes all available GPU resources (rate limiting).
- Security: It prevents unauthorized external access to our internal models.
Danger
Never share your keys with anyone.
How to get one?
- Login to https://llm.mlcloud.uni-tuebingen.de/ui . If you do not have an account or forgot the password, raise a ticket by sending an email to support@mlcloud.uni-tuebingen.de
-
Virtual Keys->+ Create New Key: From the left tab, click Virtual Keys, then the Create New Key button on the top. In the overlay that opens, the only required field to quickly get started is Key Name, which needs to be unique.Info
Owned by: If you want to share keys and usage within your group set this is Service AccountModels: leave it empty to use all models available. Or, specify model(s) to limit accessKey Type: Currently users pmöy have access to AI APIs, but if you need access to the Management APIs as well (say for programmatic hanlding of API keys), please raise a ticketTeam: Team is the group you are a part of. In the pilot phase, this scope only affect accounting, and so can be left empty
If you want to set additional constraints to the key, click Optional Settings to:
- set key expiry or auto-rotation (in Key Lifecycle)
- specify your own model alias (in Model Aliases)
-
Finally, click on Create Key, this will show the key value starting
sk-. Copy this somewhere safe, once you close the popup, it will never be accessible again.Once a key is generated, it's value can never be seen again. Create a new one
Recommended practices
- Create separate keys for each task, project and/or tool
- For coding agents, or harnesses, when creating a key, leave the models field empty or set it to
All Team Modelsso that you can easily switch between or to new models - Set an expiry for each key: In the key creation page, click
Optional Settings->Key Lifecycle- Enable auto-rotation so that you don't have to create new keys for long running projects
Chat Interface
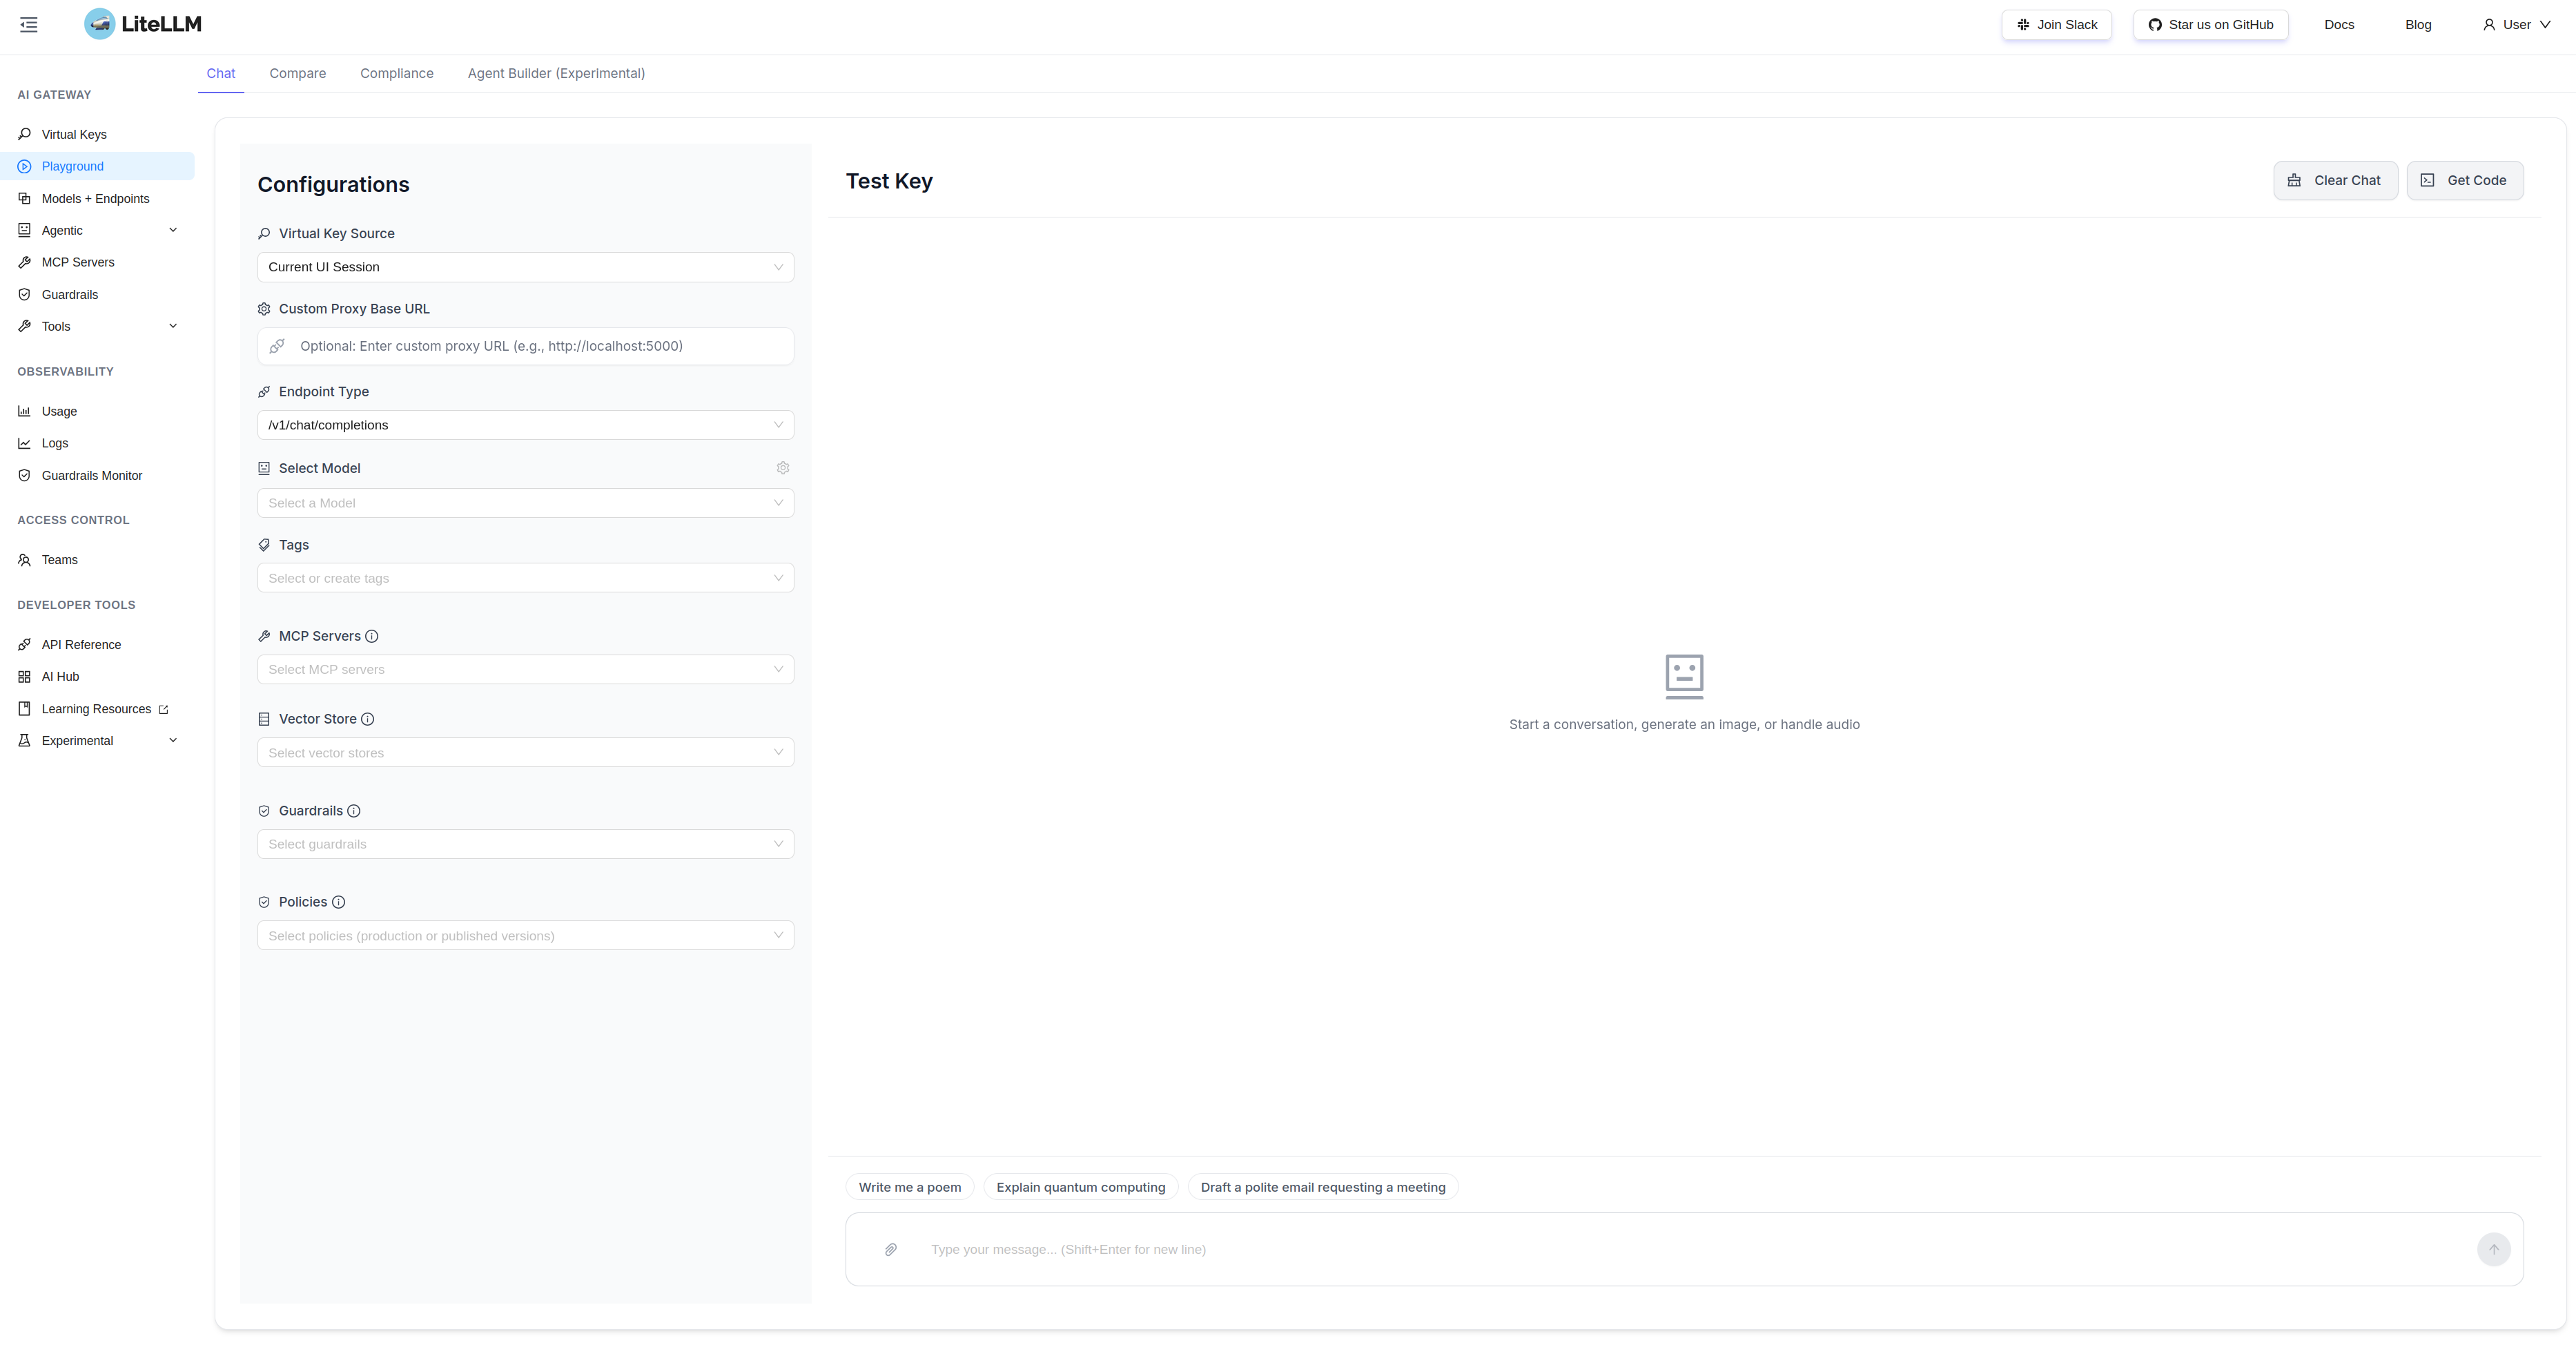
The ML Cloud does not offer a full fledged web interface to interact with the LLM(s). However, for quick, short chats that do not require tool use, the LiteLLM webUI does offer Model Playground. No API keys are required for this. Just make sure to select a model first.
On the top, there is also a Compare tab to compare responses against models.
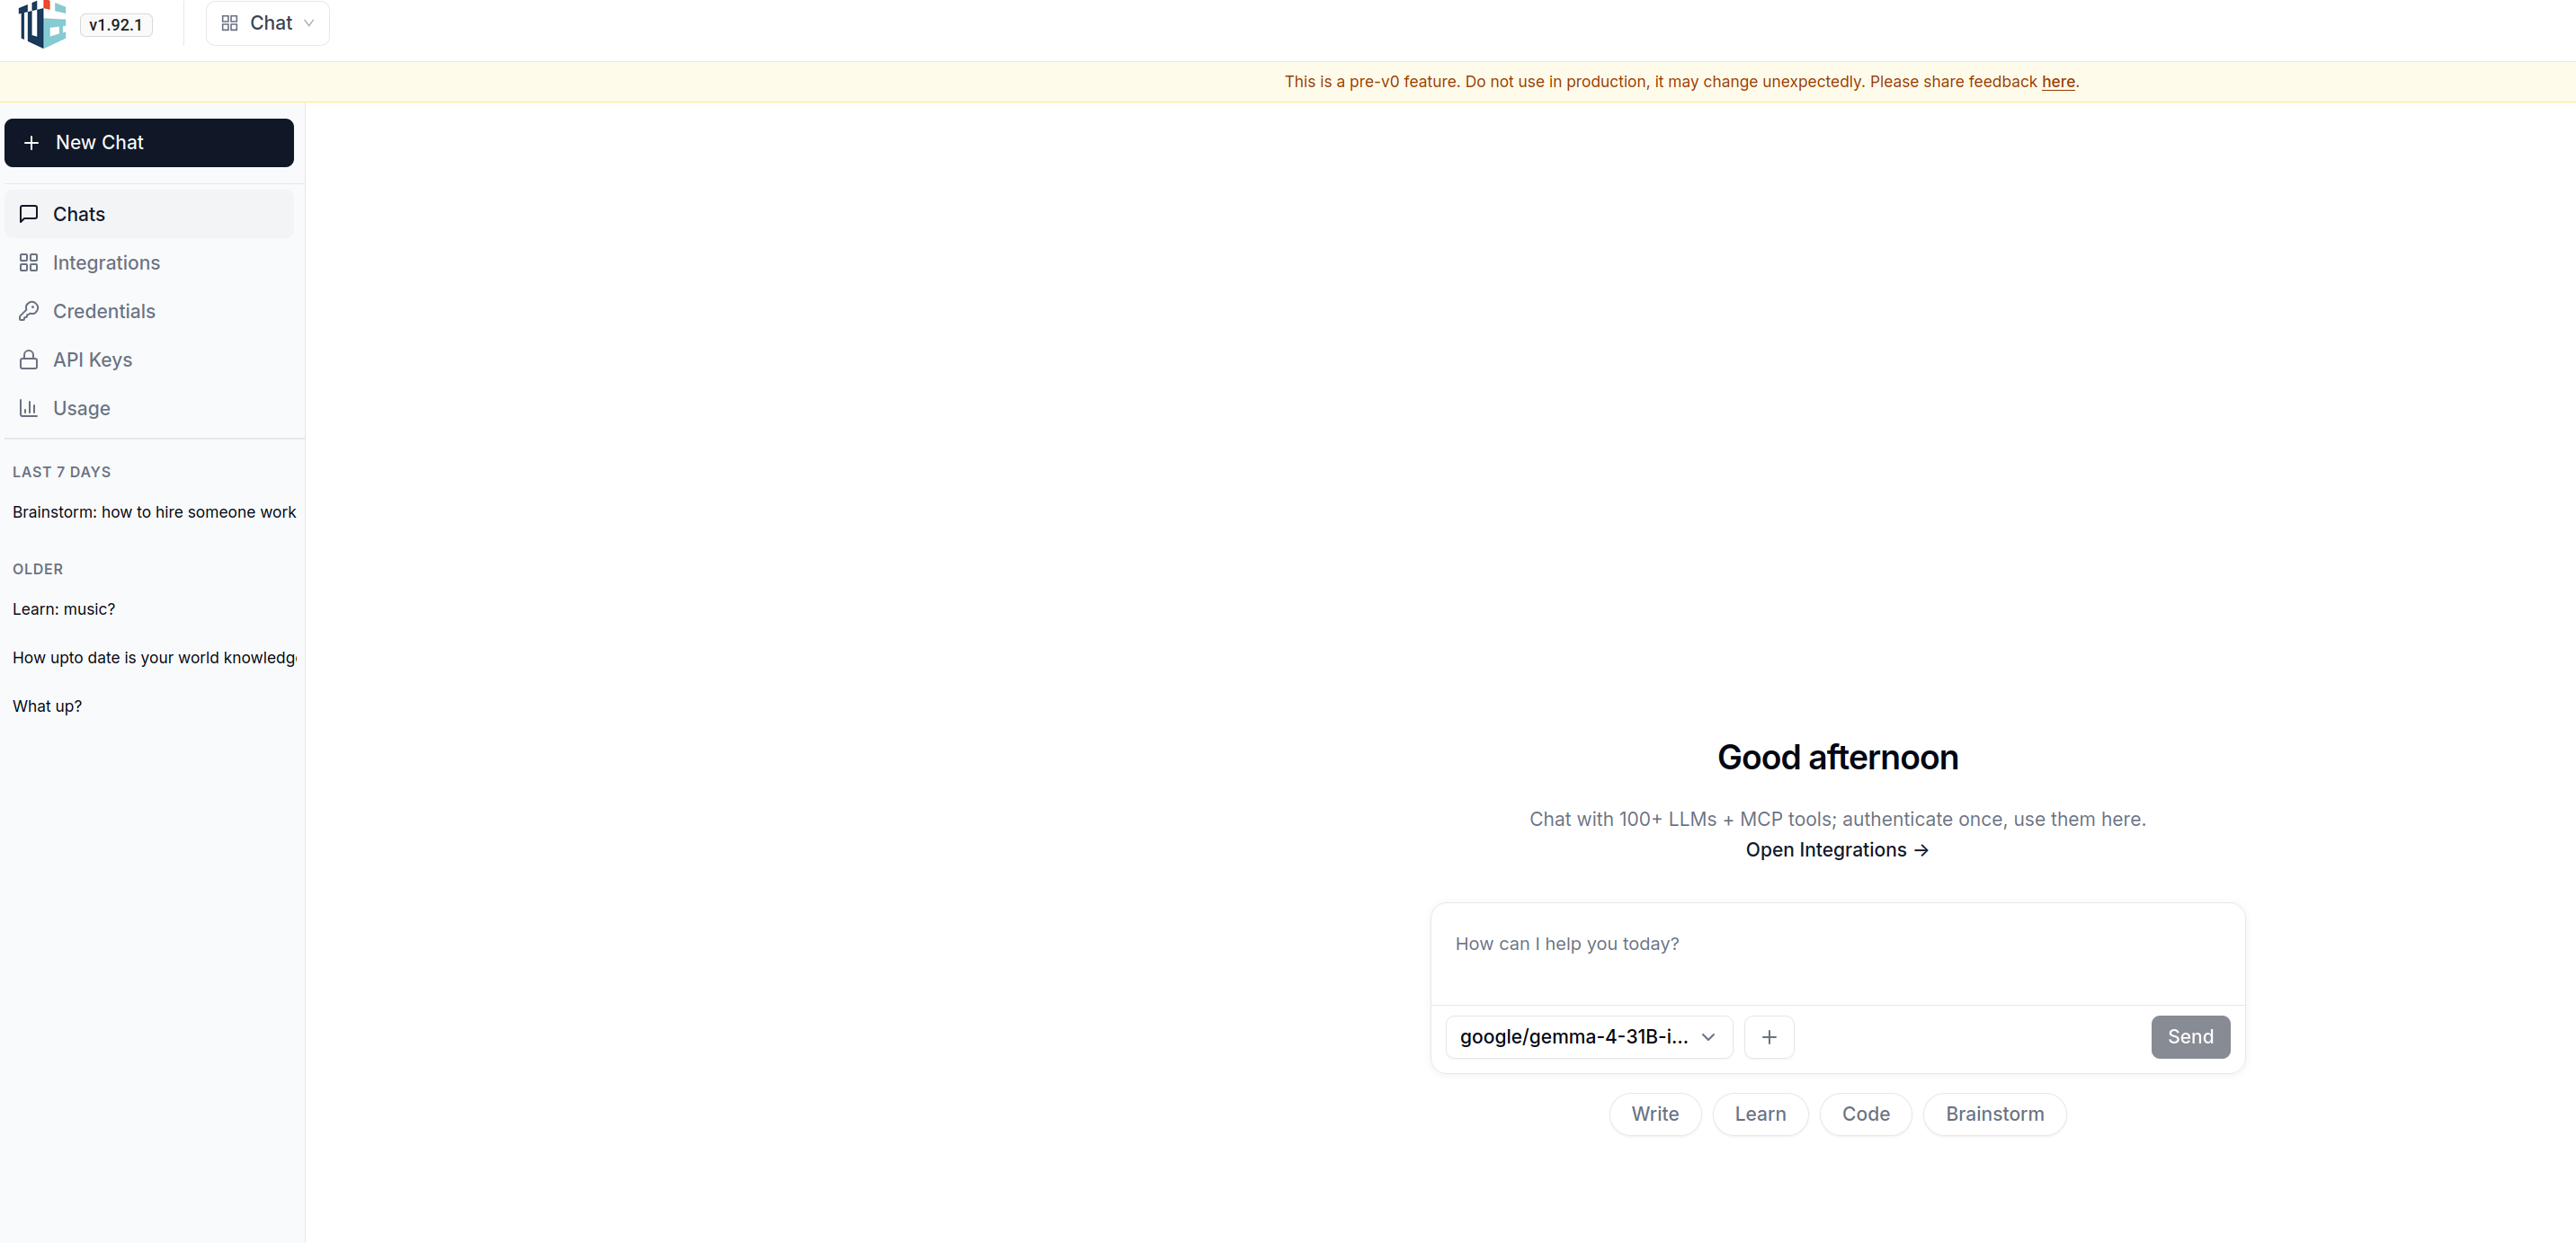
As of Aug 12, 2026 (Litellm v0.1.92), there is a more fleshed out chat UI where one can have separate chats/converations: https://llm.mlcloud.uni-tuebingen.de/ui/chat/
Local Interface
For a local and more complete chat experience, check out Jan.ai or OpenWebUI. After installing it, open settings and set up a custom provider.
Base URL: "https://llm.mlcloud.uni-tuebingen.de/v1"
API KEY: "<VIRTUAL KEY>" # this typically starts with sk-
Agent Harness
For most agent harnesses that support OpenAI compatible endpoints, it is as easy as just setting a Base URL and and API key.
export OPENAI_BASE_URL="https://llm.mlcloud.uni-tuebingen.de/v1"
export OPENAI_API_KEY="<VIRTUAL KEY>" # this typically starts with sk-
Note
Most, if not all, agent harnesses support global and project/workspace level configs, the sections below only cover project level configuration.
LiteLLM maintains docs on configuring popular AI tools and harnesses here.
Claude Code
A minimal working setup of Claude Code with a local LLM (or any third party model provider) is a 2 step process:
- Point it to the Anthropic compatible endpoint
- Configure a web search MCP
Info
For more detailed or uptodate configs, please refer the Claude Code docs.
1. Endpoint Configuration
There are currently 2 ways to go about this:
Using settings.json [RECOMMENDED]
Claude Pro + Local LLM do not go hand in hand
If you have an active Claude subscription, do note that currently there is no way to have both the Anthropic models (via subscription/OAuth) and the local models (via API) all available in the same interactive session.
In your project root, create a .claude/settings.local.json (if it doesn't exist already) and type in following
{
  "env": {
    "ANTHROPIC_BASE_URL": "https://llm.mlcloud.uni-tuebingen.de",
    "ANTHROPIC_AUTH_TOKEN": "<YOUR API KEY>",
    "CLAUDE_CODE_ENABLE_GATEWAY_MODEL_DISCOVERY":1, # OPTIONAL, RECOMMENDED
    "ANTHROPIC_DEFAULT_SONNET_MODEL": "Qwen/Qwen3.6-35B-A3B" # OPTIONAL
  }
}
With MODEL DISCOVERY enabled, Claude code can detect available models....
as long as the model names start with claude-.
Fortunately, this is possible to set with model aliases in LiteLLM.
Then launch claude specifying the model
claude --model Qwen/Qwen3.6-35B-A3B # Replace with available model of choice
Setting environment variables
export ANTHROPIC_BASE_URL="https://llm.mlcloud.uni-tuebingen.de"
export ANTHROPIC_AUTH_TOKEN="< YOUR API KEY>"

# Then launch claude specifying the model
claude --model Qwen/Qwen3.6-35B-A3B # Replace with available model of choice
This approach is useful for orchestration, or skills to delegate tasks to local LLMs while maintaing sessions with other(proprietary) model provider
2. Web search
When using third party models or gateways with Claude Code, the default web search tool is not exposed to the model. This can be fixed by adding a suitable web search MCP (Model Context Protocol), such as Brave or Tavily - both offer free web searches per month (upto a limit) but require an API key.
For the examples below, Tavily is used, but the procedures are similar for any MCP.
MCP: Claude install
Let Claude install the MCP of your choice:
claude mcp add tavily-remote-mcp --transport http https://mcp.tavily.com/mcp/
MCP: Manual
In your project root, create a .mcp.json file
{
    "mcpServers": {
        "tavily": {
            "command": "docker",
            "args": [
                "run",
                "-i",
                "--rm",
                "-e",
                "TAVILY_API_KEY",
                "mcp/tavily"
            ],
            "env": {
                "TAVILY_API_KEY": "<YOUR TAVILY API KEY>"
            }
        }
    }
}
What is MCP? - In brief
Model Context Protocol (MCP) is an open source standard for tools. Think of them as "connectors" that can be used with any agent or harness. MCP adopts a server-client architecture, where the server is the powerhouse hosting the external tools and adaptors/connectors. The command and args are dependent on the MCP tool being configured, so always refer the docs, (or ask an LLM)
The standard format for defining an MCP server is
{
    "<MCP NAME>": {
        "command": ...,
        "args": [...],
    }
}
commandis the exec or runtime tool, so a single string or keyword. Most often it isuvornpx/npmargsare the subcommands and parameters required to actually launch the MCP server
OpenCode (CLI)
OpenCode is an open source agent that helps you write and run code with any AI model. It's available as a terminal-based interface, desktop app, or IDE extension.
Model Configuration
Manual
In your project root, create a opencode.jsonc file
{
  "$schema": "https://opencode.ai/config.json",
  // [OPTIONAL] Set a default model in the form of <PROVIDER ID>/<LITELLM MODEL NAME>
  "model": "mlcloud/Qwen/Qwen3.6-35B-A3B",
  "provider": {
    // `mlcloud` is the provider ID used internally by Opencode, can be anything without spaces, special chars or uppercase
    "mlcloud": {
        "npm": "@ai-sdk/openai-compatible",
        // Display name for the provider in the `/connect` menu. Rename as desired
        "name": "ML Cloud",
        "options": {
            "baseURL": "https://llm.mlcloud.uni-tuebingen.de/v1",
            "apiKey": "<YOUR API KEY>",
            },
        // Every new model needs to be manually added here
        "models": {
                "Qwen/Qwen3.6-35B-A3B": {
                        "name": "Qwen3.6 35B A3B"
                    },
                    // "<LITELLM MODEL NAME>" : {
                    //       "name" : "<MODEL DISPLAY NAME>"
                    //   }
            },
    },
  },
  "mcp": {}
}
Plugin
The opencode-models-discovery plugin can automatically fetch all available models for any OpenAI compatible endpoint.
In your project root, create a opencode.jsonc file
{
  "$schema": "https://opencode.ai/config.json",
  "plugin": ["opencode-models-discovery@latest"],
  "provider": {
    "mlcloud": {
        "npm": "@ai-sdk/openai-compatible",
        "name": "ML Cloud",
        "options": {
            "baseURL": "https://llm.mlcloud.uni-tuebingen.de/v1",
            "apiKey": "<YOUR API KEY>",
            "modelsDiscovery": {
          "enabled": true
        }
        }
    }
  },
  "mcp": {}
}
Websearch
While Opencode does have websearch builtin (via Exa), this is only available when using their subscription plan(s) or model(s). So, similar to the Claude Code section, pick a suitable MCP and add it the config.
Below is an example for Tavily MCP via docker
  "mcp": {
        "tavily": {
            "enabled": true,
            "type": "local",
            // Do note that opencode has a slightly different structure to the MCP config format
            "command": [
                "docker",
                "run",
                "-i",
                "--rm",
                "-e",
                "TAVILY_API_KEY",
                "mcp/tavily"
                ],
            "environment": {
                "TAVILY_API_KEY": "<YOUR TAVILY API KEY>"
                }
            }
        }
VSCode
Copilot chat can be configured without any additional extensions, follow the instruction in the VS Code docs here.
Complete Copilot functionality (auto complete, auto suggest, agents) is not available to third party models at the moment (Tracked here: #308515, 318545).
There are open source alternatives such as ZooCode or KiloCode.
Pi
Pi is a minimal open source agent harness built around the concept of extensibility.
Minimal Configuration
Create a ~/.pi/agent/models.json
{
    "providers": {
        "litellm": {
            "name": "ML Cloud",
            "baseUrl": "https://llm.mlcloud.uni-tuebingen.de/v1",
            "api": "openai-completions",
            "apiKey": "<YOUR API KEY>",
            "authHeader": true,
            "models": [
                {
                    "id": "deepseek-ai/DeepSeek-V4-Flash-0731",
                    "name": "DeepSeek V4 Flash 0731",
                    "reasoning": true,
                    "input": ["text"],
                    "contextWindow": 1000000,
                    "maxTokens": 384000,
                    "thinkingLevelMap": { "low": "low", "medium": "high", "high": "high", "max": "max" },
                    "compat": { "thinkingFormat": "deepseek" }
                }
                // ,{
                //     "id:" "<LITELLM MODEL NAME>",
                //     "name": "<MODEL DISPLAY NAME>",
                //     "input": ["text", "image"],
                //     "reasoning": true,
                //     "contextWindow: <MODEL CONTEXT WINDOW>
                // }
            ]
        }
    }
}
A setup guide - Sven (User contribution)
Connecting Pi to a LiteLLM Instance
💡 Try asking Pi first. Pi is built with extensibility at its core — just tell it to “connect my LiteLLM instance” and let it handle the rest. This guide is a working setup example you can use directly or adapt for your environment.
How to connect Pi to any LiteLLM proxy using the litellm-autodiscover extension. The extension fetches the model list from your LiteLLM instance at startup and registers them automatically in Pi — no manual model configuration required.
📦 The extension is available for sharing at
extensions/litellm-autodiscover.tswith installation instructions inextensions/README.md.⚠️ Disclaimer: The
litellm-autodiscoverextension provided here is not an official community extension — it's an example of a locally AI-developed extension. For production use with long-term stability and support, you have two options:
- Use an official community extension from pi.dev/packages (see Alternative Extension below)
- Ask Pi to build a custom extension tailored to your specific needs (which is exactly what the author did in this case)
What You Need
| Item | What it's for |
|---|---|
Pi installed (@earendil-works/pi-coding-agent) |
Agent runtime |
| URL of a LiteLLM instance | Your team's or organization's LiteLLM proxy |
| A LiteLLM API key | Issued to you by the LiteLLM admin |
| A secret manager | Secure credential storage (e.g. macOS Keychain, pass, 1Password CLI, etc.) |
Step 1 — Store the API Key
Never put API keys in config files. The extension retrieves the key at runtime using a shell command (configured in auth.json). This section shows an example using macOS Keychain, but any secret manager that works on your platform can be used.
macOS Keychain example:
# Store the key
security add-generic-password -s "litellm" -w "<your-api-key>"

# Verify it was stored
security find-generic-password -ws "litellm"
Linux secret managers (examples):
- pass:
pass store litellm <<< "<your-api-key>" - gnome-keyring: use
secret-toolCLI - gnupg (gpg): encrypted vaults
- 1Password CLI:
op item create --category=password --title="litellm-api-key"
The key is that your secret management tool should be callable via shell command, so Pi can invoke it at runtime using the !command syntax in auth.json.
Step 2 — Point the Extension to Your LiteLLM Instance
Add a litellm-autodiscover section to ~/.pi/agent/settings.json:
{
"litellm-autodiscover": {
    "baseUrl": "https://your-litellm-instance.example.com"
}
}
Replace the URL with the base address of your LiteLLM instance (no trailing slash).
If this section is absent, the extension falls back to a built-in default — ask your admin if you don't have the URL yet.
Tip:
settings.jsonis the same file where you already configure enabled models and other extensions likepi-brave-search.
Step 3 — Configure Pi's Auth File
Tell Pi how to authenticate with the litellm provider. Add a litellm entry to ~/.pi/agent/auth.json. The !command prefix tells Pi to execute the shell command at runtime and use its output as the API key:
macOS Keychain (example):
{
"litellm": {
    "type": "api_key",
    "key": "!security find-generic-password -ws 'litellm'"
}
}
Linux alternatives (examples):
// Using pass
{ "litellm": { "type": "api_key", "key": "!pass show litellm" } }

// Using 1Password CLI
{ "litellm": { "type": "api_key", "key": "!op read 'op://MyVault/litellm/password'" } }

// Using environment variable with direnv or similar
{ "litellm": { "type": "api_key", "key": "$LITELLM_API_KEY" } }
Adapt the command to match whatever secret manager you use.
The file may already contain entries for other providers — just add the
litellmblock alongside them.
Step 4 — Enable the Models
The extension registers models at startup, but they are disabled by default. Add the ones you want to ~/.pi/agent/settings.json:
{
"enabledModels": [
    "litellm/<model-id-from-litellm>",
    "litellm/<another-model-id>"
]
}
The format is litellm/<model-id> where <model-id> matches the id field from the LiteLLM /v1/models response.
To find the available IDs without editing JSON by hand, run:
pi --list-models
All LiteLLM-discovered models show up under the LiteLLM provider, even the ones not yet enabled. Pick the IDs you want and add them.
Optional: Set a LiteLLM model as default
{
"defaultModel": "litellm/<model-id>",
"defaultProvider": "litellm"
}
Optional: Use LiteLLM models for subagents
{
"subagents": {
    "agentOverrides": {
    "worker":   { "model": "litellm/<model-id>" },
    "planner":  { "model": "litellm/<model-id>" },
    "reviewer": { "model": "litellm/<model-id>" }
    }
}
}
Step 5 — Verify
Start Pi and check the startup output for:
[LiteLLM] Fetched N model(s) from /v1/models.
[LiteLLM] Successfully auto-discovered and registered N model(s).
Then pick a model:
/model— opens the model picker; LiteLLM models appear under "LiteLLM"Ctrl+P— cycle through enabled models
How Configuration is Resolved
Everything lives in the standard Pi config files — no extra files to manage.
| File | What the extension reads from it |
|---|---|
~/.pi/agent/settings.json |
litellm-autodiscover.baseUrl — your LiteLLM instance URL |
~/.pi/agent/auth.json |
litellm key reference — where to find the API key |
~/.pi/agent/extensions/litellm-autodiscover.ts |
Extension logic (do not edit unless upgrading) |
Troubleshooting
LiteLLM models don't appear
| Check | What to do |
|---|---|
| API key is retrievable | Run the command you configured in auth.json (e.g. pass show litellm) and verify it outputs your key |
| Endpoint is reachable | curl -s <baseUrl>/v1/models -H "Authorization: Bearer $(<your-secret-command>)" |
| Base URL is set | grep baseUrl ~/.pi/agent/settings.json |
Failed to fetch models: 401
Your API key is invalid or expired. Reset it in your secret manager and then restart Pi or run /reload.
Failed to find key: command not found or ENOENT
The command configured in auth.json doesn't exist or isn't on your PATH. Verify the command works directly from your terminal, and adapt it if you use a different secret manager than the examples above.
Failed to fetch model info (404/503), using defaults
Non-fatal. Your LiteLLM instance does not expose /v1/model/info. Models are still registered with sensible defaults (128K context window / 8K max output). Ask your admin to enable the endpoint for accurate context window sizes and cost data.
Could not parse settings.json, using built-in default baseUrl
Your ~/.pi/agent/settings.json has invalid JSON. Validate it:
cat ~/.pi/agent/settings.json | python3 -m json.tool
Changes don't take effect
Run /reload in Pi to re-initialise all extensions. Changes to auth.json or settings.json also require /reload or a restart.
Alternative Extension: pi-provider-litellm
If you prefer a simpler approach, the pi-provider-litellm package provides an alternative way to connect Pi to a LiteLLM instance. This package-based extension is available in the Pi package registry and may offer a more streamlined setup for users who don't need the full autodiscovery capabilities of the litellm-autodiscover extension.
Visit pi.dev/packages/pi-provider-litellm for installation instructions and configuration details.
Companion Extension: pi-brave-search
Pi also supports web search via extensions. One example is pi-brave-search, a community extension that integrates with the Brave Search API. In ~/.pi/agent/settings.json:
{
"packages": [
    "npm:@e9n/pi-brave-search"
],
"pi-brave-search": {
    "apiKey": "<your-brave-search-api-key>"
}
}
This gives Pi real-time web search on top of LiteLLM model inference — useful for documentation lookups and research tasks without leaving the agent.
📦 The extension is available for sharing at
extensions/litellm-autodiscover.tswith installation instructions inextensions/README.md.
Created: July 6, 2026